Material Characterization Services by Method
- Coefficient of Thermal Expansion (CTE) - TMA
- Compression Properties - TMA, DMA
- Compression Set - TMA, DMA
- Cure - DSC
- Deformation Temperature - TMA, DMA
- Dimensional Stability - TMA
- Ductility - DMA
- Flexural Properties - TMA, DMA
- Microhardness
- Porosity - SEM-EDS
- Softening Point - TMA, DMA
- Time to Delamination - TMA
- Total Mass Loss (TML) - TGA
- Material Characterization Related Standards
Microhardness
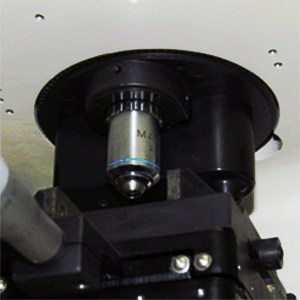
As the direction of materials science continues towards studying the basis of properties on smaller and smaller scales, different techniques are used to quantify material characteristics and tendencies. Measuring mechanical properties of materials on smaller scales, like thin films, cannot be done using conventional hardness testing. As a result, Microhardness testing was developed to measure material hardness by micro-indenting a material which requires a microscope to view and measure the size of the indentation to arrive at a hardness result. Microhardness testers are also the preferred method to measure hard and brittle materials.
Applications:
- Hardness testing of shim material, thin films and brittle materials
Standard and Modulated Differential Scanning Calorimetry (DSC & MDSC)
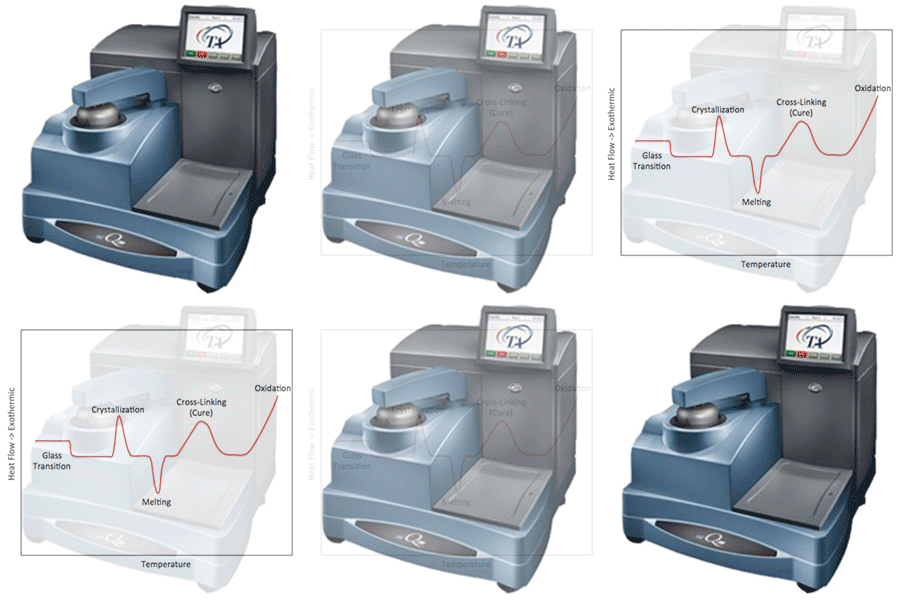
Differential Scanning Calorimeters (DSC) measures temperatures and heat flows associated with thermal transitions in a material in the temperature range of -90°C to 725°C. Common usage of a DSC includes investigation, selection, comparison and end-use performance evaluation of materials in research, quality control and production applications. Properties measured by DSC techniques include glass transitions, "cold" crystallization, phase changes, melting, crystallization, product stability, cure / cure kinetics and oxidative stability. Samples for a DSC can be solid or liquid with mass ideally from 10mg to 20mg and are placed in standard pans or hermetic pans. Modulated DSC adds the additional capability to resolve thermal events that have heat capacity component (reversing heat flow) from those that have a kinetic component (nonreversing heat flow). Often, these overlapping events make analysis with standard DSC difficult and subtle thermal events may be concealed within a more prominent thermal event.
Applications:
- Measurement of Glass Transition Temperature
- Percent Crystalinity of a Polymer
- Degree of Cure of Thermosetting Epoxy
- Melting Point and Heat Capacity
Dynamic Mechanical Analysis (DMA)
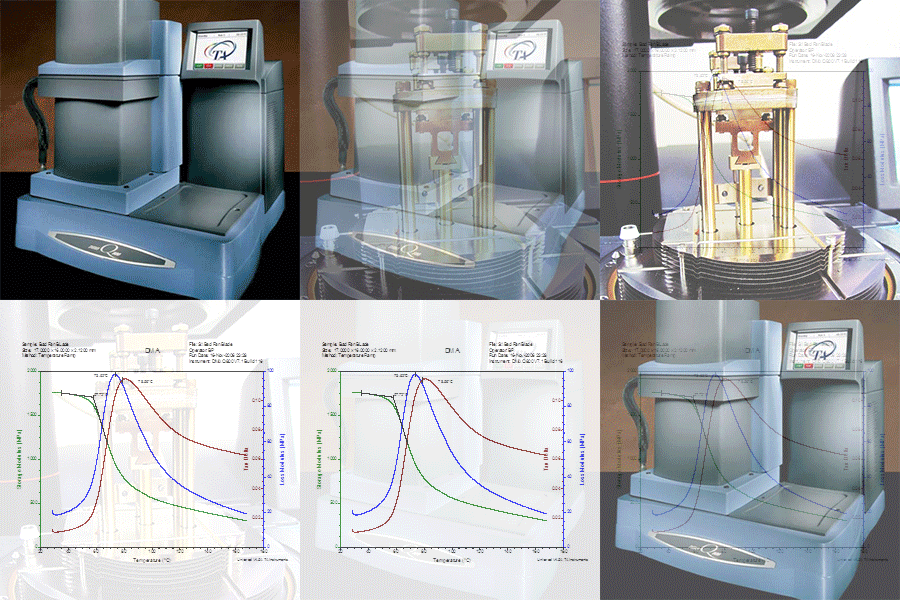
Dynamic Mechanical Analysis measures viscoelastic properties (modulus and energy dissipation) of a material as it is deformed under a controlled stress/strain. Operating over a wide temperature range (-150°C to 600°C), the DMA provides multiple modes of deformation with fixtures for dual/single cantilever and 3-point bending and tension. In Dual/Single Cantilever mode, the sample is clamped and either flexed in the middle (dual cantilever) or at one end (single cantilever). Cantilever bending is a good general-purpose mode for evaluating thermoplastics and highly damped materials (e.g., elastomers). Dual cantilever mode is ideal for studying the cure of supported thermosets. In 3-point bend mode, the sample is supported at both ends and force is applied in the middle. In tension mode, the sample is placed in tension between a fixed and moveable clamp.
Applications:
- Characterizing Printed Wiring Boards
- Complex Modulus Measurement
- Compression Properties
- Compression Set
- Deformation Temperature
- Effect of Adhesive Coatings on Films
- Flexural Properties
- Softening Point
- Glass Transition
- Loss Modulus Measurement
- Prediction of Long Term Material Performance using Time/Temperature Superpositioning (TTS)
- Stiffness
- Storage Modulus Measurement
- Tan Delta Measurement
Real-Time X-Ray Microscope with 2D and 3D Analysis
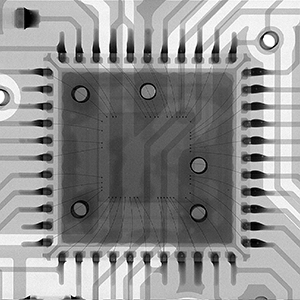
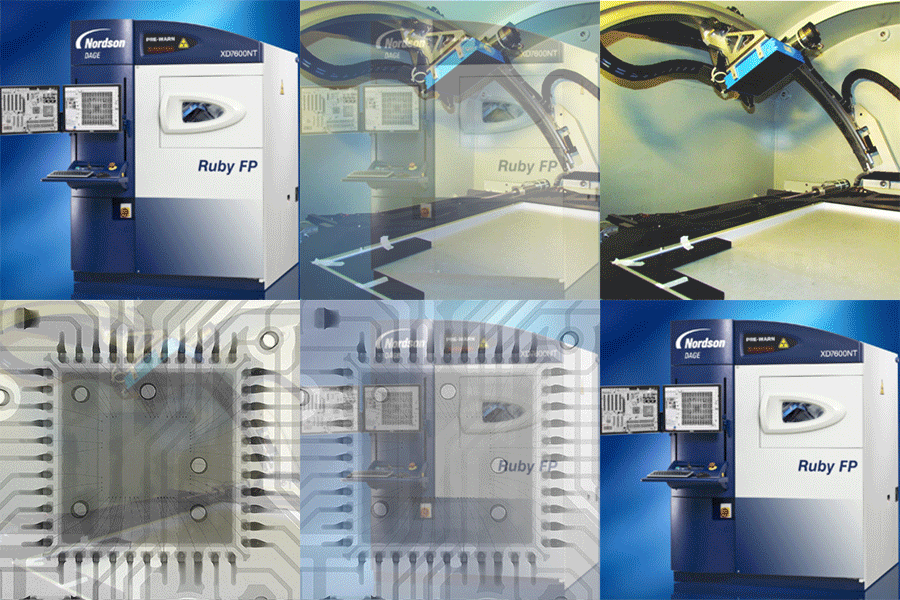
Real time 2D and 3D X-ray allows for nondestructive X-ray analysis of specimens. Defects in products from use or deficiencies with manufacturing processes can be detected and analyzed. The Dage Ruby FP at Accolade Engineering has magnification up to 16,500x and detail detectability down to 500nm. Utilities in the operating software allow for voiding, roundness and diameter measurements of solder attachments, QFN solder measurements and semiconductor wire sweep are also among the image analysis utilities of the tool.
Applications:
- Non-destructive product quality evaluation
- Solder process capability studies
- Integrated Circuit Failure Analysis
- Failure Analysis
- Counterfeit Component Analysis
C-Mode Scanning Acoustic Microscopy (CSAM)
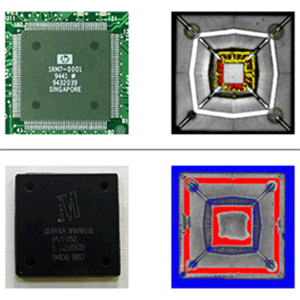
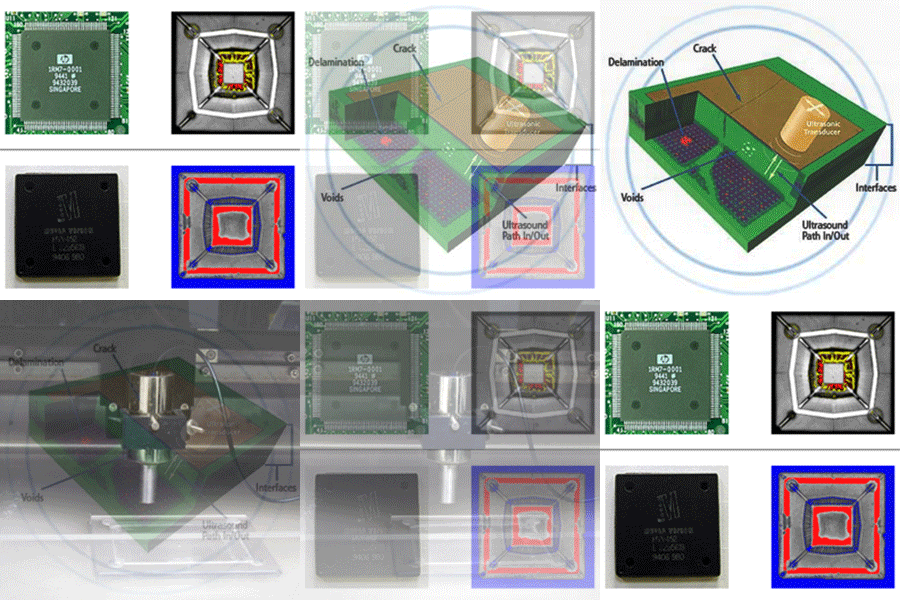
C-mode scanning acoustic microscopy (CSAM) is a non-invasive, non-destructive technique that can be used to image the internal features of a specimen that are too transparent for transmission X-Ray. CSAM provides some advantages over other available NDT technologies which make it a superior tool for certain materials and processes. Using an ultrasonic transducer and water as a coupling medium to the sample, the acoustic signals reflect at the interfaces between materials with different acoustic impedances. Integrating the time domain windowing and time of flight, specific features in a sample can be isolated and imaged. CSAM is highly sensitive to the presence of delamination at sub-micron thicknesses. It is one of the only techniques capable of efficiently evaluating popcorning or heat related damage in epoxy encapsulated integrated circuits. CSAM can also evaluate low and high-density plastic materials. CSAM is particularly useful for inspection of small, complex devices. Defect resolution, dependent on the transducer frequency, can be as small as a few micrometers. CSAM can also be used to measure the thickness of an internal layer of material when the material and its acoustic impedance are known.
Applications:
- Integrated Circuit Failure Analysis
- Delamination
- Component Authenticity Verification
Scanning Electron Microscopy with Energy Dispersive X-Ray Spectroscopy (SEM-EDS)
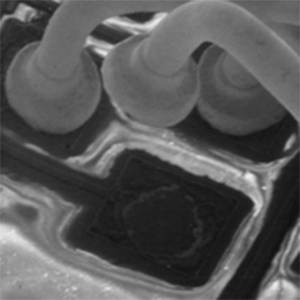
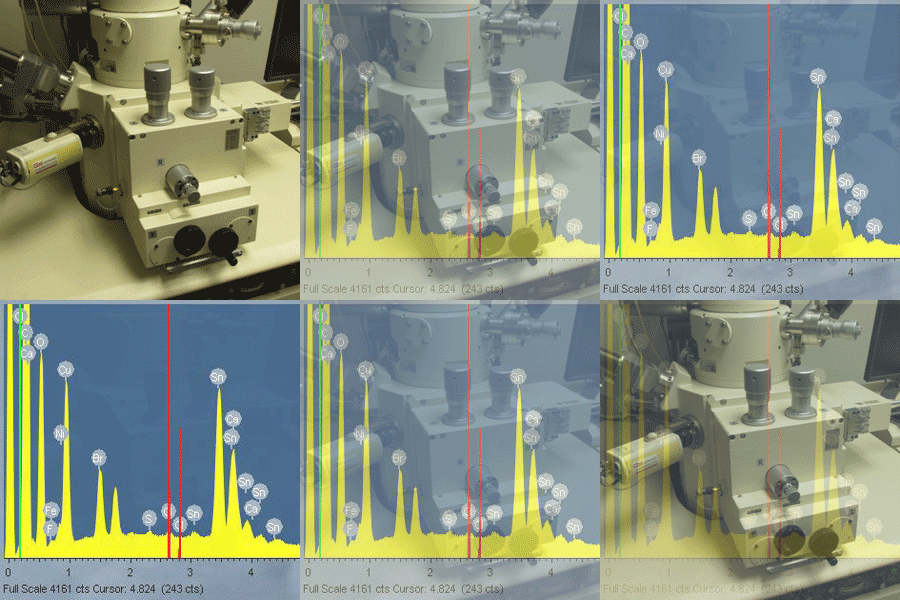
The scanning electron microscope (SEM) uses a focused beam of high-energy electrons to generate a variety of signals at the surface of solid specimens. The signals that originate from electron-sample interactions reveal information about the sample including external morphology (texture) and chemical composition. In most applications, data is collected over a selected area of the surface of the sample and a 2-dimensional image is generated that displays spatial variations in these properties. Electron microscopes provide high spatial resolution and high depth of focus along with high magnification. Energy-dispersive X-ray spectroscopy (EDS), as part of an SEM, is an analytical technique used for the elemental analysis or chemical characterization of a sample. It relies on the investigation of an interaction of some source of X-ray excitation and a sample. Its characterization capabilities are due in large part to the fundamental principle that each element has a unique atomic structure allowing unique set of peaks on its X-ray spectrum. To stimulate the emission of characteristic X-rays from a specimen, a high-energy beam of charged particles such as electrons is focused into the sample being studied. At rest, an atom within the sample contains ground state (or unexcited) electrons in discrete energy levels or electron shells bound to the nucleus. The incident beam may excite an electron in an inner shell, ejecting it from the shell while creating an electron hole where the electron was. An electron from an outer, higher-energy shell then fills the hole, and the difference in energy between the higher-energy shell and the lower energy shell is released in the form of an X-ray. The number and energy of the X-rays emitted from a specimen can be measured by the EDS detector. As the energy of the X-rays are characteristic of the difference in energy between the two shells, and of the atomic structure of the element from which they were emitted, the elemental composition of the specimen can be determined and quantified by weight percentage.
Applications:
- Component Authenticity Verification
- Counterfeit Component Analysis
- Contamination Analysis
- Printed Circuit Board Analysis
- Alloy Composition
- Composition
- Corrosion
- Deterioration
- Hazardous Substance Analysis
- Heavy Metals/Lead Content
- Purity
- Restriction of Hazardous Substances (RoHS)
Thermogravimetric Analysis (TGA)/ TGA with Mass Spectrometer (TGA-MS)
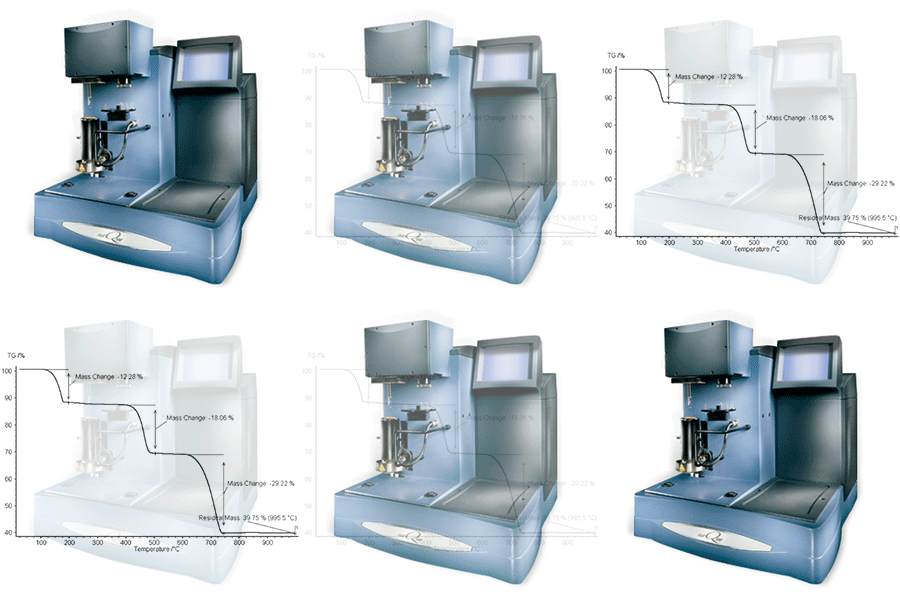
Thermogravimetric Analysis (TGA) measures weight changes in a material as a function of temperature (or time) under a controlled atmosphere. With an operating temperature range to 1000°C and the ability to switch gases during an experiment, its principal uses include measurement of a material's thermal stability and composition. The samples can be solid or liquid with mass ideally between 10mG to 20mg. The research grade TGA at AES has high resolution and stepwise isothermal operating modes. Adding a Mass Spectrometer to sample the evolved gas during TGA experiments (TGA-MS) allows greater understanding of the sample through monitoring of selected ion groups.
Applications:
- Total Mass Loss (TML)
- Filler content of polymers
- Trapped moisture
- Volatile analysis
- Individual compound percentages in a sample
- Oxidation studies
- Stability studies
Thermomechanical Analysis, Dynamic Thermomechanical Analysis (TMA/DTMA)
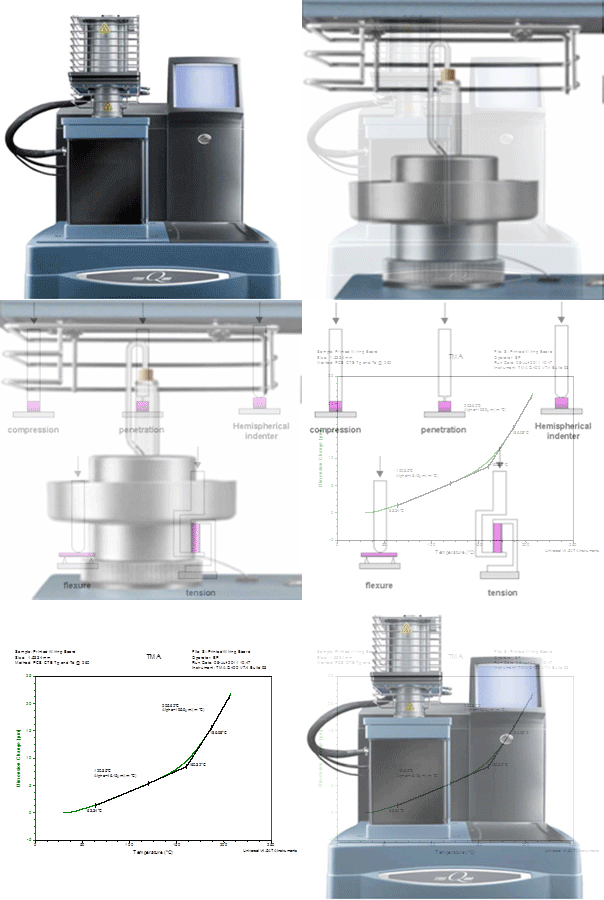
Many materials undergo changes of their thermomechanical properties during heating or cooling. Phase changes, sintering steps or softening can occur in addition to thermal expansion. With an operating range from -150°C to 1000°C, the TMA analysis can provide valuable insight into the composition, structure, production conditions or application possibilities for various materials. The application range of instruments for thermomechanical analysis extends from quality control to research and development. Typical domains include plastics and elastomers, paints and dyes, composite materials, adhesives, films and fibers, ceramics, glass, metals, and composite materials. Testing probes include expansion, penetration along with specialized fixtures for film/fiber testing and 3 point bend. The TA instruments Q400-EM offers many of the dynamic test methods found in a Q800 DMA but allows smaller sample sizes and lower CTE quartz fixturing. In the dynamic mode of operation, the TMA is known as a dynamic TMA. The modulated capability of the Q400-EM at AES allows the total dimension changes to be resolved into the revering (heat only) and non-revering (kinetic - heat and time) components. This mode of operation is useful when reversing and non-reversing events overlap and cause a distorted total dimension change signal from which useful measurements are not possible.
Applications:
- Coefficient of Thermal Expansion (CTE)
- Compression Properties
- Compression Set
- Creep Analysis (dynamic TMA)
- Deformation Temperature
- Dimensional Stability
- Film Tensile Testing
- Flexural Properties
- Multilayer Film Analysis
- Shrinkage Force Testing
- Softening Point
- Stress Relaxation Analysis (dynamic TMA)
- Printed Circuit Board Analysis
- Time to Delamination
- Viscoelastic Property Determination (dynamic TMA)
Material Characterization Related Standards
- ASTM B0568 "Standard Test Method for Measurement of Coating Thickness by X-Ray Spectrometry"
- ASTM C518 "Standard Test Method for Steady-State Thermal Transmission Properties by Means of the Heat Flow Meter Apparatus"
- ASTM D792 "Standard Test Methods for Density and Specific Gravity (Relative Density) of Plastics by Displacement"
- ASTM D3418 "Standard Test Method for Transition Temperatures and Enthalpies of Fusion and Crystallization of Polymers by Differential Scanning Calorimetry"
- ASTM D3850 "Standard Test Method for Rapid Thermal Degradation of Solid Electrical Insulating Materials By Thermogravimetric Method (TGA)"
- ASTM E384 "Standard Test Method for Knoop and Vickers Hardness of Materials"
- ASTM E831 "Standard Test Method for Linear Thermal Expansion of Solid Materials by Thermomechanical Analysis"
- ASTM E1356 "Standard Test Method for Assignment of the Glass Transition Temperatures by Differential Scanning Calorimetry"
- ASTM E1530 "Standard Test Method for Evaluating the Resistance to Thermal Transmission of Materials by the Guarded Heat Flow Meter Technique"
- ASTM E1640 "Standard Test Method for Assignment of the Glass Transition Temperature By Dynamic Mechanical Analysis"
- ASTM E831 "Standard Test Method for Linear Thermal Expansion of Solid Materials by Thermomechanical Analysis"
- IPC-CC-830 "Qualification and Performance of Electrical Insulating Compound for Printed Wiring Assemblies"
- IPC-TM-650, Method 2.3.28 "Ionic Analysis of Circuit Boards, Ion Chromatography Method"
- IPC-TM-650, Method 2.3.28.1 "Halide Content of Soldering Fluxes and Pastes"
- IPC-TM-650, Method 2.3.28.2 "Bare Printed Board Cleanliness by Ion Chromatography"
- IPC-TM-650, Method 2.3.38 "Surface Organic Contaminant Detection Test"
- IPC-TM-650, Method 2.3.39 "Surface Organic Contaminant Identification Test (Infrared Analytical Method)"
- IPC-TM-650, Method 2.4.24 "Glass Transition Temperature and Z-Axis Thermal Expansion by TMA"
- IPC-TM-650, Method 2.4.24.1 "Time to Delamination (TMA Method)"
- IPC-TM-650, Method 2.4.24.2 "Glass Transition Temperature of Organic Films - DMA Method"
- IPC-TM-650, Method 2.4.24.3 "Glass Transition Temperature of Organic Films - TMA Method"
- IPC-TM-650, Method 2.4.24.4 "Glass Transition and Modulus of Materials Used in High Density Interconnection (HDI) and Microvias -DMA Method"
- IPC-TM-650, Method 2.4.24.5 "Glass Transition Temperature and Thermal Expansion of Materials Used In High Density Interconnection (HDI) and Microvias -TMA Method"
- IPC-TM-650, Method 2.4.24.6 "Decomposition Temperature (Td) of Laminate Material Using TGA"
- IPC-TM-650, Method 2.4.25 "Glass Transition Temperature and Cure Factor by DSC"
- IPC-TM-650, Method 2.4.41 "Coefficient of Linear Thermal Expansion of Electrical Insulating Boards"
- IPC-TM-650, Method 2.4.41.3 "In-Plane Coefficient of Thermal Expansion, Organic Films"
- IPC-TM-650, Method 2.6.10 "X-Ray (Radiography), Multilayer Printed Wiring Board Test Methods"
Copyright (c) 2014 accoladeeng.com. All rights reserved. | Design by FreeCSSTemplates.org.

